
Card 11 using the new Rainbow Butterflies Digikit.
You will need a graphics programme such as CAP2 or MCS to make this card.
This card uses Rainbow Butterflies set 7.

This card uses Rainbow Butterflies set 7.

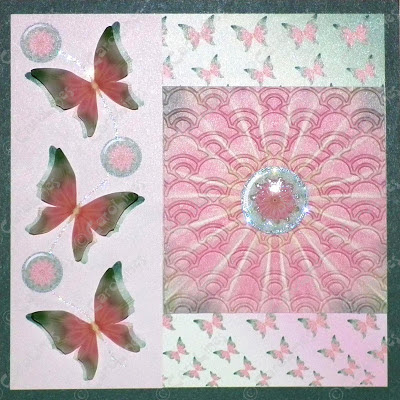
1: Create a dark green square in your graphics programme approx. 13.5 cm x 13.5 cm.
2: Import the swirling butterflies paper, re-size and position over the green paper.
3: Create a pale pink oblong, re-size and position to the left side over the butterfly paper.
4: Import the patterned paper and re-size so it fits in the middle of the butterflies paper as illustrated.
5: Import the button and place it the centre of the patterned paper..
6: Copy, paste, re-size and position in the pink panel.
7: Import the butterfly, re-size, rotate by approx. 20 degrees, copy and paste so there are 3, and position
down the pink panel, reversing the direction of the central butterfly.
8: Group the images together and print on to good quality card.
9: 'Deconstruct' the card keeping the 3 butterflies, the square patterned paper square and the central
button. Print butterflies on to vellum and the others on to card.
10: Cut out the vellum butterflies, removing the antennae, and glue just the bodies on to the butterflies on
the card.
11: Use an embossing folder and machine (eg. Cuttlebug) to add texture to the patterned square. Glue this
over the button the card, and apply Glossy Accents and glitter.
12: Use a glue pen and glitter to make a butterfly trail down the pink panel.

No comments:
Post a Comment
Thank you for your comments, they are greatly appreciated.